Airgapped upgrade guide
Upgrade BugSnag On-premise on a high availability cluster in an airgapped environment.
Upgrading your instance
Upgrading BugSnag will take approximately 15 minutes. During the upgrade there should not be any downtime if you have enabled high availability features.
Before upgrading, ensure you have backups of your current installation. See Backup & Restore guide for more information.
It is not necessary to upgrade notifier libraries used by your applications when upgrading BugSnag On-premise, although sometimes new features will require upgrading notifiers.
For more information about the updates see https://enterprise-updates.bugsnag.com.
Update AWS resources
If you provisioned AWS resources with CloudFormation, you should check you are using the latest CloudFormation template version v1.8.1 before upgrading.
Upgrade Replicated KOTS
Check KOTS version
Port-forward to the admin console:
kubectl kots admin-console --namespace bugsnagView the admin console at
http://localhost:8800and check the current version at the bottom of the page.Get the version of the KOTS CLI installed on your machine:
kubectl kots versionIf the KOTS admin console and CLI versions match the BugSnag supported version of
v1.129.2skip the remaining steps in this section.Download KOTS installation packages
BugSnag will have provided you with a URL to download the offline installation packages. Download
v1.129.2of the following packages:- KOTS CLI (
kots_linux_amd64.tar.gz) - KOTS Admin Console Bundle (
kotsadm.tar.gz)
- KOTS CLI (
Update KOTS CLI
Update the KOTS CLI version on the machine you use to manage your cluster to the supported version:
tar xvf kots_linux_amd64.tar.gz
sudo mv kots /usr/local/bin/kubectl-kots
Push KOTS admin console images
Push KOTS admin console images to your registry:
kubectl kots admin-console push-images ./kotsadm.tar.gz <REGISTRY_ADDRESS> \
  --namespace bugsnag \
  --registry-username <RW_USERNAME> \
  --registry-password <RW_PASSWORD>
Placeholder Description <REGISTRY_ADDRESS>Address of the private image registry including the namespace <RW_USERNAME>Username for an account that has read and write access to the private image registry <RW_PASSWORD>Password for the account with read and write access Upgrade KOTS admin console
Upgrade the KOTS admin console in your cluster to the same version as the KOTS CLI using registry read-only credentials:
kubectl kots admin-console upgrade \
  --namespace bugsnag \
  --kotsadm-registry <REGISTRY_ADDRESS> \
  --registry-username <RO_USERNAME> \
  --registry-password <RO_PASSWORD>
Placeholder Description <REGISTRY_ADDRESS>Address of the private image registry including the namespace <RO_USERNAME>Username for an account that has read-only access to the private image registry <RO_USERNAME>Password for the account with read-only access
Upgrade BugSnag
Download BugSnag airgap package
BugSnag will have provided you with a URL to download the offline installation packages. Download the latest version of the BugSnag App Bundle (the file extension will be
.airgap).curl -L -o bugsnag.airgap "<URL provided>"Access the Replicated KOTS admin console
Port-forward to the admin console:
kubectl kots admin-console --namespace bugsnagView the admin console at
http://localhost:8800.Upload new version of BugSnag
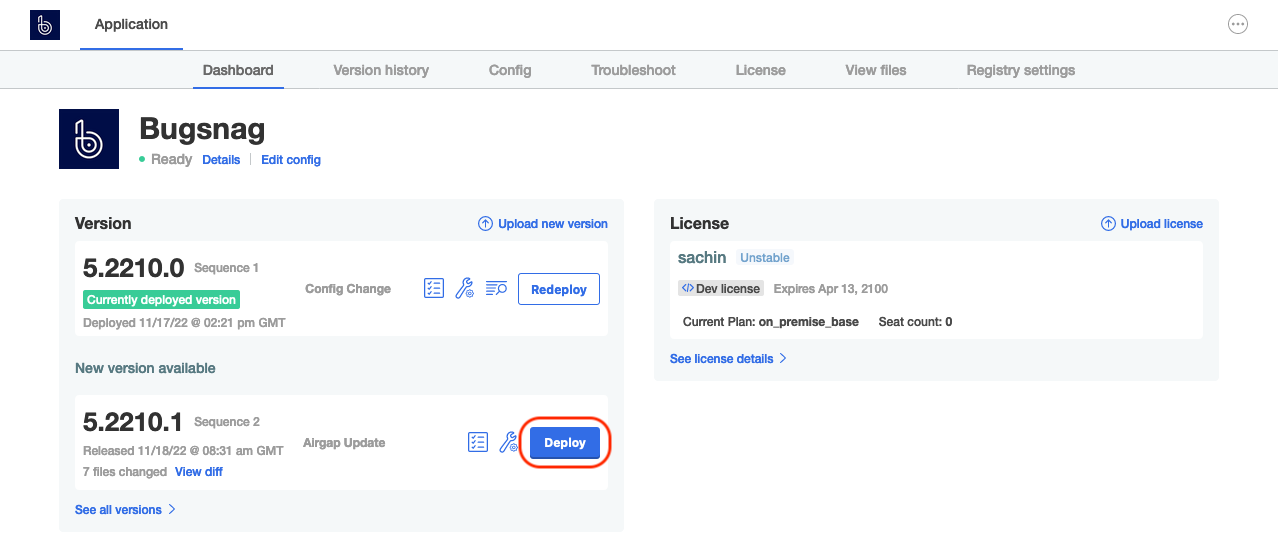
Press the ‘Upload new version’ button to upload the airgap package and add it to the list of available versions.

Deploy new version of BugSnag
Press the ‘Deploy’ button next to the new version to start upgrading your installation.

Upgrade complete
Once the upgrade has completed the admin console will indicate that it is ‘Ready’.
