Showing full stacktraces
BugSnag supports unminifying and demangling stacktraces using ProGuard, DexGuard, and R8 mapping files, Unity library symbols, NDK symbols and LLVM debug symbol maps (dSYMs), to show a full stacktrace with methods, file paths, and line numbers for Android and iOS projects in Unity.
This documentation is for version 5 of the BugSnag Unity notifier. We recommend upgrading to the latest release using our Upgrade guide. Documentation for the current release can be found here.
Uploading debug symbol maps (dSYMs) for iOS
If you are using Bitcode, you will need to send dSYM files to BugSnag in order to symbolicate native iOS stack traces. Our iOS symbolication guide provides details on how to automate this process.
Uploading mapping files for Android
If you have enabled ProGuard, DexGuard or R8 Mappings or use the NDK, you will need to send mapping files to BugSnag in order to deobfuscate Android stack traces.
By using the BugSnag Gradle Plugin, ProGuard, DexGuard, R8, NDK, and Unity library mapping files will be automatically uploaded.
Exported Android projects
If you have exported your Unity Android project, you can follow the Android instructions for the BugSnag Android Gradle Plugin ensuring you edit your Launcher module AndroidManifest.xml and build.gradle files.
Adding the BugSnag Gradle Plugin to Unity
The BugSnag Gradle Plugin is added directly though Unity and uploads ProGuard, DexGuard, R8, NDK, and Unity library mapping files as part of the Android Unity build process.
When building from Unity, mappings are only uploaded for non-development builds, ensure Build settings -> Development build is unchecked.
For Projects using Unity 2021
Our BugSnag Gradle Plugin is not yet compatible with Unity 2021 projects. Until our plugin is uplifted you will need to upload your Unity mappings manually.
To do this, you will need to create a debugging symbols.zip file when you build your project.
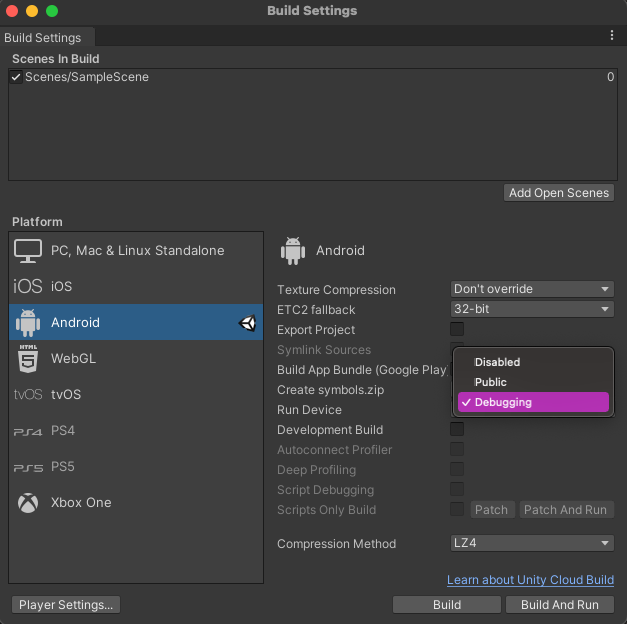
When you unzip your symbols.zip file, you will find sub-folders for each of your target architectures specified in your player settings.
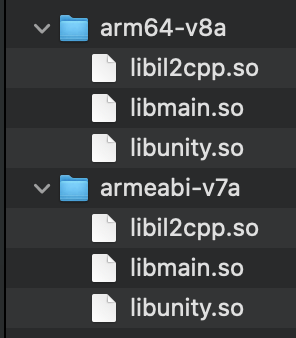
The libil2cpp.so files contain full debug mappings and therefore symbol mapping files can be generated and uploaded to the /so-symbol endpoint as described here.
The libunity.so files do not contain full debug mappings. You will need to generate the symbol table mapping file and upload to the /so-symbol-table endpoint as described here.
Make sure to generate the above files using the correct objdump from the corresponding NDK toolchain for your arch type.
For Projects using Unity 2019 and Unity 2020
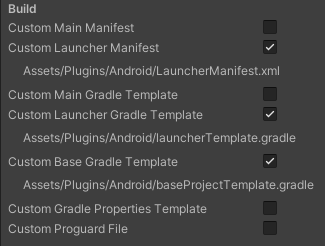
Enable Custom Build Options
Navigate to:
Player settings -> Android tab -> Publishing Settings -> Build
Select the checkboxes for:
- Custom Launcher Manifest
- Custom Launcher Gradle Template
- Custom Base Gradle Template
This enables edits to the AndroidManifest.xml and build.gradle files via the LauncherManifest.xml, launcherTemplate.gradle and baseProjectTemplate.gradle files.
Installation
Add the following dependency to Assets/Plugins/Android/baseProjectTemplate.gradle:
buildscript {
    dependencies {
        // ...
        classpath "com.bugsnag:bugsnag-android-gradle-plugin:5.+"
    }
}
Apply the plugin in your file at Assets/Plugins/Android/launcherTemplate.gradle:
apply plugin: "com.android.application"
apply plugin: "com.bugsnag.android.gradle"
// ...
Finally, ensure your API key is present in the <application> section of your LauncherManifest.xml at Assets/Plugins/Android/LauncherManifest.xml:
<application ...>
    <meta-data
        android:name="com.bugsnag.android.API_KEY"
        android:value="your-api-key-here" />
</application>
You can find your API key when creating a project in your BugSnag dashboard, or later from your project settings page.
For Projects using Unity 2018
You will need to ensure that the Build System is set to Gradle in your Build Settings.
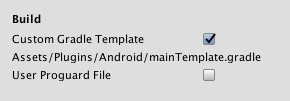
Enable Custom Build Options
Navigate to:
Player settings -> Android tab -> Publishing Settings -> Build
Select the checkbox for:
- Custom Gradle Template
This enables edits to the build.gradle file via the mainTemplate.gradle file.
Installation
Add the following dependency to Assets/Plugins/Android/mainTemplate.gradle:
buildscript {
    dependencies {
        //...
        classpath "com.bugsnag:bugsnag-android-gradle-plugin:5.+"
    }
}
And apply the plugin further down within that same file:
//...
apply plugin: "com.android.application"
**APPLY_PLUGINS**
apply plugin: "com.bugsnag.android.gradle"
// ...
Finally, you will need to add your API key to your AndroidManifest.xml. To retrieve the template for your AndroidManifest you will need to navigate to your Unity install location and expand:
PlaybackEngines -> AndroidPlayer -> Apk -> AndroidManifest.xml
Copy the AndroidManifest.xml into your Assets/Plugins/Android/ folder.
Add your API key to the <application> section of your AndroidManifest.xml:
<application ...>
    <meta-data
        android:name="com.bugsnag.android.API_KEY"
        android:value="your-api-key-here" />
</application>
You can find your API key when creating a project in your BugSnag dashboard, or later from your project settings page.
Basic and Additional Configuration
By default the plugin automatically uploads ProGuard, DexGuard, R8, and NDK mapping files. For information on disabling automatic upload, along with the basic and advanced configuration options for the plugin, see our Android Gradle Plugin docs.
The configuration options for the bugsnag extension will need to be placed in your launcherTemplate.gradle if you are using Unity 2019 and up. If you are using Unity 2018, you will need to place configuration options for the bugsnag extension underneath where you have applied the plugin in your mainTemplate.gradle.
Uploading Unity Symbols
By default for projects that use IL2CPP, the plugin will upload Unity library mapping files for every non-development build. This improves the symbolication of stack frames originating from Unity Library code.
If you’d prefer to disable this automatic uploading, set the uploadNdkUnityLibraryMappings property in your app’s LauncherTemplate file:
bugsnag {
    uploadNdkUnityLibraryMappings = false
}
Exported Android Projects
If you export an Android project from Unity then you should enable the “Create symbols.zip” checkbox:
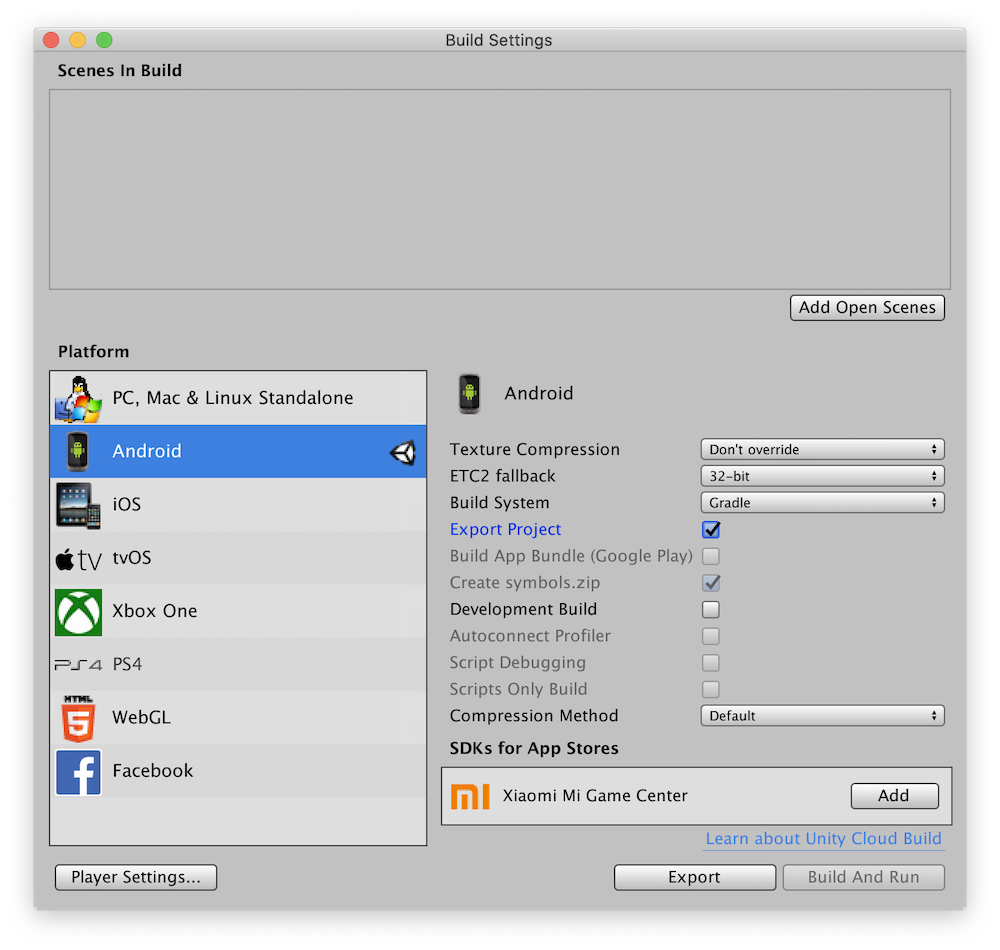
This exports an archive of Unity symbols to the same directory as your Gradle project. Do not move or rename this archive as otherwise BugSnag’s gradle plugin will be unable to upload the symbols.
Unity 2020 is affected by a bug where the symbols.zip archive is not exported for Gradle projects. If you wish to symbolicate Unity library frames you should use a different version of Unity or build directly from the Unity editor.